Feb25-Buttons2_01.gif (819 bytes) Feb25-Buttons2_02.gif (432 bytes) Feb25-Buttons2_03.gif (656 bytes) Feb25-Buttons2_04.gif (796 bytes) Feb25-Buttons2_05.gif (857 bytes) Feb25-Buttons2_06.gif (466 bytes) Feb25-Buttons2_07.gif (558 bytes) Feb25-Buttons2_08.gif (527 bytes) Feb25-Buttons2_09.gif (457 bytes)


Freedom Pillow
webpage_freedom_pillow2b-sm.jpg (26053 bytes)
-With right sides together stitch the bottom of the pillowcase closed.
-Set the pillowcase aside.

Ruffle:
-Fold the ruffle in half lengthwise, wrong sides together and press.
-Gather the ruffle.
-Pin the ruffle to the right side of the pillowcase. While pinning, ease the gathered ruffle evenly around the pillowcase.
-Sew the ruffle to the pillowcase.
-With the zig-zag stitch, hem the facing.
-Sew the right side of the facing to the ruffle seam allowance.
-Fold the facing to the inside of the pillowcase and iron.
-Sew 5 button-holes along the edge of the pillow case. Sew the button-holes through the facing also.
-Sew 5 buttons in place.

Pillow form:
-Cut a rectangle of the muslin 28" X 22".
-Fold in half right sides together forming a rectangle 14" X 22".
-With right sides together, stitch it closed using a 1/2" seam allowance. Leave a 5" opening on the bottom seam for turning.
-Turn and stuff with poly-fil. Blind-stitch the opening closed.
-Slip the pillow form into the pillowcase and button it closed.webpage_facing freedom pillow-b.jpg (37869 bytes)
          Inside the Freedom pillow showing the facing.

webpage_eagle_buttons-b.jpg (29289 bytes)

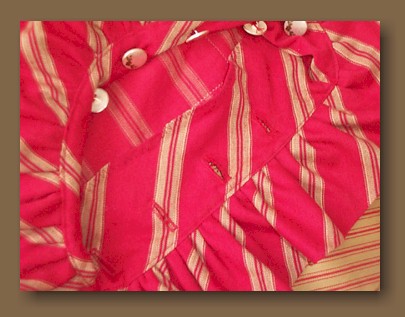
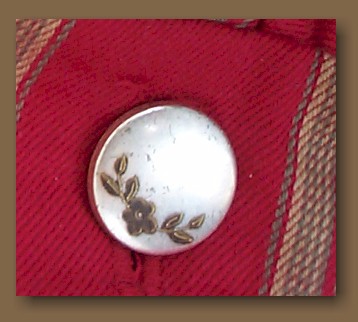
Supply list:
*1-1/3 yd. red striped ticking- pillow case- MODA Fabrics #1700-48
*3/4 yd. muslin-pillow
*18" X 18" Prairie cloth, linen or tightly woven fabric- background of Freedom cross-stitch (Choose a piece light enough so the stamping will show up.)
*20 oz. Polyfil
*5 buttons LaMode 3/4" Antique silver with a flower.
(I know that you will want these....they are so sweet!)
*DMC floss # 75
 

Pillow case Instructions:
All measurements include a 1/2" seam allowance.

-Cut a rectangle of the ticking fabric 23-1/2" X 28- 1/2" long.
-Cut 2 bias strips 7" wide for the ruffle from the ticking. Sew the 2 strips together to make about 48" of 3-1/2" finished ruffle.
-Cut a bias strip 3-1/2" X 28-1/2". This will be used for the facing. Set aside.
-Fold the ticking pillowcase in half creating a rectangle 23-1/2" X 14". Set aside.
-Follow the instructions for the iron-on transfer sampler and iron the pattern on to the background fabric you have chosen.
-Stitch the Freedom Sampler pattern with 2 strands of DMC floss #75.
-Trim the backgound fabric of the Freedom Sampler to 9-1/2" X 17-1/2".
-Pull 6 threads on all four sides to make the fringe.
-Place the stitched Freedom Sampler on the ticking. Center the design 2-1/2" from the left edge of the pillow and 3-1/2" from the right edge. This allows extra space on the right side for the buttons.
-Baste in place and stitch the Freedom Sampler to the front of the pillow ticking. Use the zig-zag stitch on your sewing machine with matching thread.
-With right sides together stitch the left side of the pillowcase closed.


Feb25-Buttons2_01.gif (819 bytes) Feb25-Buttons2_02.gif (432 bytes) Feb25-Buttons2_03.gif (656 bytes) Feb25-Buttons2_04.gif (796 bytes) Feb25-Buttons2_05.gif (857 bytes) Feb25-Buttons2_06.gif (466 bytes) Feb25-Buttons2_07.gif (558 bytes) Feb25-Buttons2_08.gif (527 bytes) Feb25-Buttons2_09.gif (457 bytes)


Last modified: Tuesday, April 30, 2002 email webmaster